Yes, you absolutely can hang gymnastic rings from your ceiling for a great home gym setup ceiling! But doing it right is super important for safety. It’s not just about attaching them; it’s about ensuring the structural support for ceiling rings is strong enough to handle your weight and movements. This guide will show you how to securely hang gym rings by properly locating and using ceiling joists or approved mounting systems, explaining the process of gymnastic rings ceiling installation from start to finish.
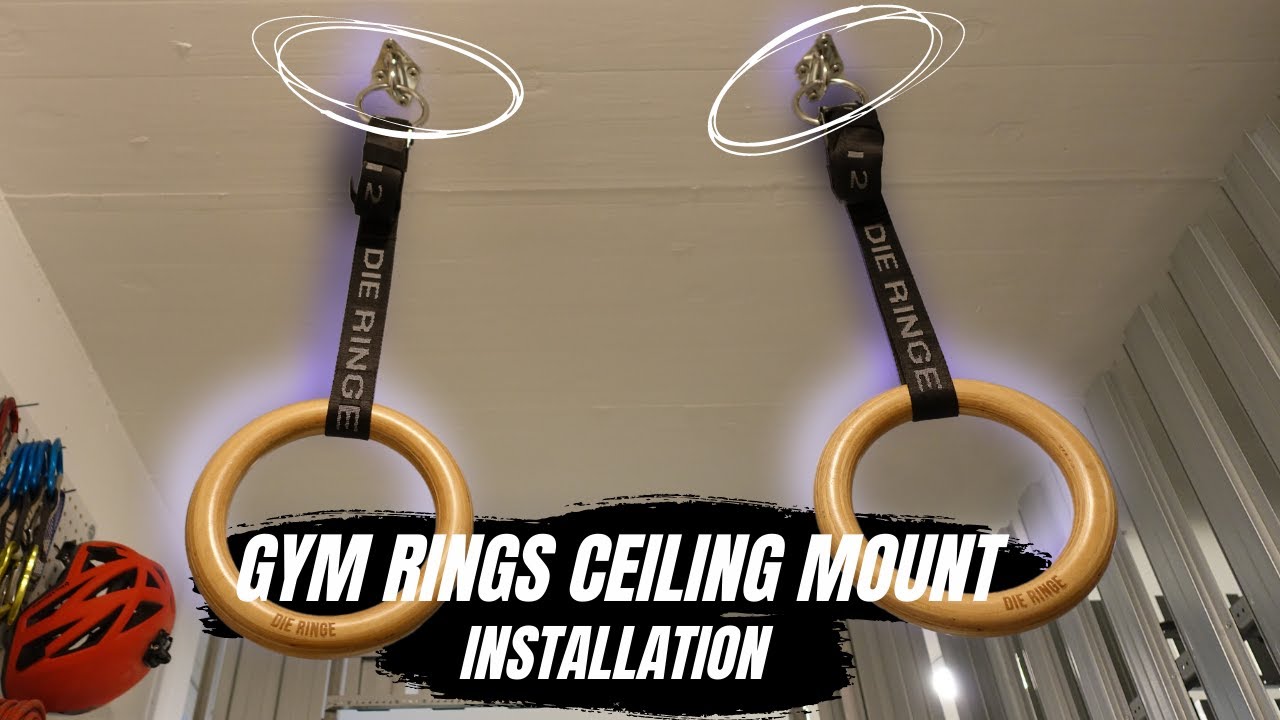
Image Source: i.ytimg.com
Fathoming Why Ceiling Mounts Work
Hanging gymnastic rings from the ceiling offers awesome benefits for your fitness goals. It lets you train freely with a huge range of motion. Unlike door frames or pull-up bars, ceiling mounts usually provide more height and clearance, which is key for many ring exercises.
But this freedom comes with a big need for safety. Your ceiling is designed to hold weight, but not just anywhere. The strength comes from the frame, usually wooden beams called joists. Attaching your rings to these joists is the gold standard for securely hang gym rings.
Interpreting Your Ceiling Structure
Before you grab a drill, you need to know what’s above you. Most home ceilings have wooden joists. These are the beams that hold up the floor above (or the roof if it’s the top story). They run parallel to each other, often 16 or 24 inches apart.
- Finding the Joists: This is the most important step for hanging rings from ceiling joist.
- Stud Finder: A good quality electronic stud finder is your best friend here. Slide it along the ceiling surface. It will beep or light up when it detects a joist. Mark the edges and the center.
- Tapping: You can try tapping the ceiling. It will sound hollow between joists and solid when you tap on a joist. This takes practice.
- Looking for Clues: Sometimes, lines of nails or screws show where drywall is attached to joists. Look for subtle lines.
- Measuring from Walls: Joists often start a standard distance from load-bearing walls. If you can find one joist, you can sometimes measure 16 or 24 inches sideways to find the next one.
- Attic Access: If you have attic access above, you can see the joists directly and measure where you want to hang the rings from above. Be careful up there!
Remember, attaching hardware directly into drywall or plaster is not safe. It will not hold the weight needed for gymnastic rings. You must hit a joist or use a specially designed mounting system that spreads the load.
Deciphering Your Hardware Needs
To securely hang gym rings, you need the right gear. This includes more than just the rings themselves.
Choosing Ceiling Mounting Hardware for Rings
This is where the rubber meets the road, or rather, the metal meets the wood. Your hardware must be strong. It needs to handle the “dynamic load.” This means not just your body weight hanging still (static load) but also the extra force created when you swing, transition between moves, or drop into a hang. This dynamic load can be several times your body weight.
Here are common options for ceiling mounting hardware for rings:
-
Heavy-Duty Eye Bolts or Lag Screws:
- These are long screws with a loop (eye bolt) or a head (lag screw) on one end.
- They are screwed directly into the center of a ceiling joist.
- Pros: Simple, relatively inexpensive, very strong when properly installed into a solid joist.
- Cons: Requires accurate joist finding. Need the right size (e.g., 3/8″ or 1/2″ diameter, several inches long). The eye bolt loop must be thick and welded shut.
- Rating: Look for hardware rated for overhead lifting or high load capacity. Don’t use standard hooks from the hardware store.
-
Mounting Plates/Brackets:
- These are metal plates or brackets with multiple screw holes. They often have a loop, hook, or ring attachment point.
- They are designed to be screwed into one or two adjacent joists (if possible) or into blocking added between joists.
- Pros: Can potentially spread the load over a larger area or into multiple joists for extra safety. Often look cleaner.
- Cons: More expensive than simple eye bolts. Requires precise alignment with joists. Installation can be more complex.
- Rating: These will have a stated weight capacity. Check if it’s rated for static and/or dynamic loads.
-
Specialized Ceiling Ring Mounts:
- Some companies sell kits specifically for mounting fitness rings to ceiling.
- These are often heavy-duty plates or crossbar systems designed for this purpose.
- Pros: Designed specifically for the forces involved. May include all needed hardware and instructions.
- Cons: Can be the most expensive option.
Table of Hardware Options
| Hardware Type | Description | Key Benefit | Key Requirement |
|---|---|---|---|
| Heavy-Duty Eye Bolt (Welded) | Long screw with a closed loop end | Simple, strong (in joist) | Must hit solid joist center |
| Heavy-Duty Lag Screw with Loop | Long screw with a head, used with a separate loop | Very strong connection to joist | Needs a separate, rated loop/hanger |
| Mounting Plate/Bracket | Metal plate with multiple screw holes & loop | Spreads load, potentially over 2 joists | Needs precise joist alignment |
| Specialized Ceiling Kit | System designed specifically for rings/swings | Designed for dynamic loads | Often highest cost |
Important: Avoid using standard S-hooks or quick links that are not load-rated. Use proper climbing-rated carabiners or strong, welded loops.
What About Ceiling Anchors for Gymnastic Rings?
Standard drywall anchors, toggle bolts, or plastic expansion anchors are not suitable for dynamic overhead loads like gymnastic rings. They are designed for hanging lighter static loads like pictures or shelves, not supporting body weight during exercise.
There are heavy-duty anchors designed for concrete ceilings. If you have a concrete ceiling, you would need specific concrete anchors (like wedge anchors or sleeve anchors) rated for the load. However, this guide focuses on typical residential wood-framed ceilings. For wood joists, direct attachment to the joist is the safest method. Ceiling anchors for gymnastic rings used in wood-framed ceilings are generally not recommended due to the high forces involved.
Other Necessary Gear:
- Gymnastic Rings and Straps: Choose durable rings (wood, plastic, or metal) and strong, adjustable straps.
- Carabiners: Use high-strength, locking carabiners (climbing rated is a good benchmark) to attach straps to the mounting hardware. This adds a layer of safety and makes setup easier.
- Tools:
- Stud finder (electronic recommended)
- Measuring tape
- Pencil
- Drill (corded is often better for power)
- Drill bits (sized for pilot holes, slightly smaller than your screw/bolt diameter)
- Wrench or socket set (for eye bolts/lag screws)
- Level
- Safety glasses (crucial!)
- Dust mask (optional, for drilling drywall)
Grasping the Installation Process
Once you have your gear and have found your joists, it’s time for the gymnastic rings ceiling installation. Take your time and follow these steps carefully.
Step 1: Plan and Measure
- Find the Joists: Use your stud finder to locate and mark the edges of the joists where you plan to hang the rings. Mark the center of the joist clearly. You need two joists.
- Determine Spacing: A common distance between rings for most exercises is 18 to 20 inches (about 45-50 cm). Measure this distance and find two parallel joists with their centers that far apart. Mark the exact spot on the center line of each joist where your hardware will go. Double-check your measurements.
- Check Height: Make sure you have enough height for hanging and exercising. Consider how much space the rings and straps take up, plus clearance below.
Step 2: Prepare the Spot
- Clear the Area: Move any furniture or objects below where you’ll be working.
- Put on Safety Glasses: Drywall dust and debris will fall when you drill. Protect your eyes.
Step 3: Drilling Ceiling for Gymnastic Rings
This step is critical for ensuring the hardware goes into the joist correctly and the wood doesn’t split.
- Choose the Right Bit: Select a drill bit slightly smaller than the diameter of your eye bolt or lag screw. The screw threads need something to grip into. Drilling a pilot hole that is too large will make the connection weak. A common rule is to use a bit the size of the screw’s inner core (not including the threads). Check the hardware packaging or manufacturer website for recommended pilot hole size if available.
- Drill Straight Up: Hold your drill as straight as possible, pointing directly up into the marked joist center.
- Drill the Pilot Hole: Drill a pilot hole into the joist at each marked spot. Drill deep enough for your hardware to get a good grip – slightly longer than the threaded part of your eye bolt or lag screw. You’ll feel resistance change when you hit the wood joist after going through the drywall.
Step 4: Installing the Ceiling Mounting Hardware for Rings
Now, it’s time to put the hardware in place.
-
Install Hardware:
- For Eye Bolts/Lag Screws: Line up the point of the eye bolt or lag screw with the pilot hole. Start screwing it in. Use a wrench, socket, or a sturdy rod through the eye (for eye bolts) to turn it. Screw it in until the eye or head is snug against the ceiling surface (or against a washer, if using one) but do not overtighten. Overtightening can strip the wood threads you just created in the joist, weakening the connection. The threaded part should be fully embedded in the joist.
- For Mounting Plates/Brackets: Line up the plate over the pilot holes you drilled through the joist center (or centers if using a wider plate). Use the screws provided with the plate (usually lag screws) to attach it firmly to the joist. Follow the manufacturer’s instructions regarding pilot hole size and screw installation.
-
Verify Connection: The hardware should feel extremely solid. Try to wiggle it firmly by hand (don’t hang on it yet!). There should be no noticeable movement.
Step 5: Attach Straps and Rings
- Connect Straps: Use your carabiners or the integrated attachment method on your straps to link the ring straps to the installed ceiling hardware.
- Adjust Height: Adjust the strap length to your desired height for different exercises.
- Hang Rings: Attach the rings to the other end of the straps.
Ensuring Weight Capacity Ceiling Ring Mount and Structural Support
You’ve done the gymnastic rings ceiling installation. Now, safety checks are vital.
Checking Hardware Ratings
- Always buy hardware that has a stated weight capacity.
- Be aware that static load (just hanging) is much less demanding than dynamic load (swings, pull-ups, muscle-ups). Dynamic loads can easily double or triple the force on the mount.
- Ideally, find hardware rated for dynamic overhead use. If not, choose hardware with a static load rating that is significantly higher than the maximum force you expect to generate. A common recommendation is a 5x safety factor – meaning the static load rating is 5 times your body weight or more. However, for dynamic movements, even this might be low. Hitting a solid joist correctly is the most critical factor.
The Importance of Hanging Rings from Ceiling Joist
We keep coming back to joists because they are the structural support for ceiling rings. They are designed to bear significant weight. Drywall is not. Screwing directly into a joist ensures that the load is transferred to the strong framing of your house.
Testing the Setup
Before you do a full workout, test the mount slowly and safely.
- Apply Partial Weight: Gently hang from the rings with your feet still on the floor or just slightly off the ground. Put some weight on them, but don’t take your full weight yet. Check for any signs of stress – creaking sounds, movement of the hardware, cracking in the ceiling.
- Apply Full Static Weight: If the partial test is fine, hang with your full body weight. Hang still for 30 seconds. Again, listen and watch closely for any issues.
- Gentle Dynamic Test: If the static test passes, perform some very light, controlled movements. Gentle pulls, light swings. Gradually increase the intensity over several sessions, always checking the mounts.
If you hear any cracking, see movement, or anything feels wrong at any point, STOP immediately. The installation is not secure. You might have missed the joist, used the wrong hardware, or the joist itself might not be strong enough (less common in modern construction for typical loads, but possible in older homes or with compromised wood).
Pro Tips for a Secure Home Gym Ring Setup Ceiling
- Measure Twice, Drill Once: Be absolutely sure you’ve found the joist center before drilling.
- Don’t Skimp on Hardware: Buy high-quality, load-rated hardware. It’s a small cost compared to the potential consequences of a failure.
- Pilot Holes are Essential: They prevent wood splitting and help the screw track straight into the joist center.
- Tighten Just Right: Snug is good, overtightened is bad.
- Consider Blocking: For the absolute strongest structural support for ceiling rings, especially if joist spacing isn’t ideal or you want extra peace of mind, you can add wood blocking between joists and attach your hardware to that. This is a bigger project, usually requiring opening the ceiling.
- Check Regularly: Before each workout, or at least once a week, quickly inspect the hardware. Look for any loosening, damage to the ceiling around the mount, or unusual sounds.
- Know Your Limits: The strength of the mount is only as good as the joist it’s attached to and the hardware used. Don’t attempt moves that create excessive force if you are unsure of your setup’s capacity.
- Distance Matters: While 18-20 inches is standard, you can adjust the spacing slightly based on your shoulder width and preferred exercises. Just make sure you hit the joist centers.
FAQs: Mounting Fitness Rings to Ceiling
H3: Can I hang rings if I have metal joists?
Metal joists are common in some commercial buildings. You cannot use lag screws or wood-specific hardware. You would need specialized metal fasteners or a system designed to clamp onto or bolt through the metal joists. This is more complex and might require professional installation to ensure safety and preserve the building’s structure. For a standard home gym ring setup ceiling with metal joists, consulting a structural engineer or experienced contractor is highly recommended.
H3: How far apart should the ceiling mounts be for rings?
Most people find a distance of 18 to 20 inches (about 45-50 cm) between the two mounting points works well for a variety of exercises. This spacing aligns roughly with shoulder width. Make sure you find two parallel joists that match your desired spacing.
H3: What is the best type of ceiling mounting hardware for rings?
Heavy-duty lag screws with a separate rated loop or a high-quality mounting plate are often preferred for their strength when installed correctly into joists. Welded eye bolts are also common. The “best” depends on your ceiling structure and budget, but it must be load-rated and installed into structural support (like a joist).
H3: Do I need ceiling anchors for gymnastic rings?
For standard wood-framed residential ceilings, no. You need to attach directly into the wooden ceiling joists. Standard ceiling anchors are for light, static loads only and are not safe for dynamic overhead movements. Ceiling anchors for gymnastic rings are not a safe solution for typical drywall/joist construction.
H3: How do I know the weight capacity ceiling ring mount is sufficient?
Check the manufacturer’s rating on the hardware. For overhead dynamic loads, look for hardware specifically rated for this use, or use hardware with a high static load rating (often 5 times your body weight or more is suggested as a minimum safety factor, but dynamic forces can exceed this). The strength also relies heavily on the integrity of the joist and correct installation (hanging rings from ceiling joist). If unsure, consult a professional.
H3: Can I use a pull-up bar instead if I can’t do a gymnastic rings ceiling installation?
Yes! If mounting fitness rings to ceiling isn’t an option due to ceiling structure or height, a sturdy wall-mounted pull-up bar, a doorway pull-up bar (use with caution and check door frame strength), or a power rack with a pull-up bar are all good alternatives for many bodyweight exercises, although they won’t offer the full range of motion unique to rings.
Wrapping Up Your Secure Ring Setup
Installing gymnastic rings from your ceiling can be one of the best upgrades for a home gym. It unlocks powerful bodyweight training movements. The key to a successful home gym ring setup ceiling is focusing on safety first. By taking the time to properly locate joists, choosing strong ceiling mounting hardware for rings, drilling ceiling for gymnastic rings correctly with pilot holes, and ensuring you have solid structural support for ceiling rings, you can securely hang gym rings and train with confidence. Always double-check your work and perform safety tests before using the rings fully. Get it right, and enjoy the incredible strength and control that ring training builds!