Installing gym flooring yourself is a great way to save money and make your home gym perfect. This guide will walk you through how to install gym flooring step by step. You will learn about different types of flooring, what tools you need, and how to get the job done right.
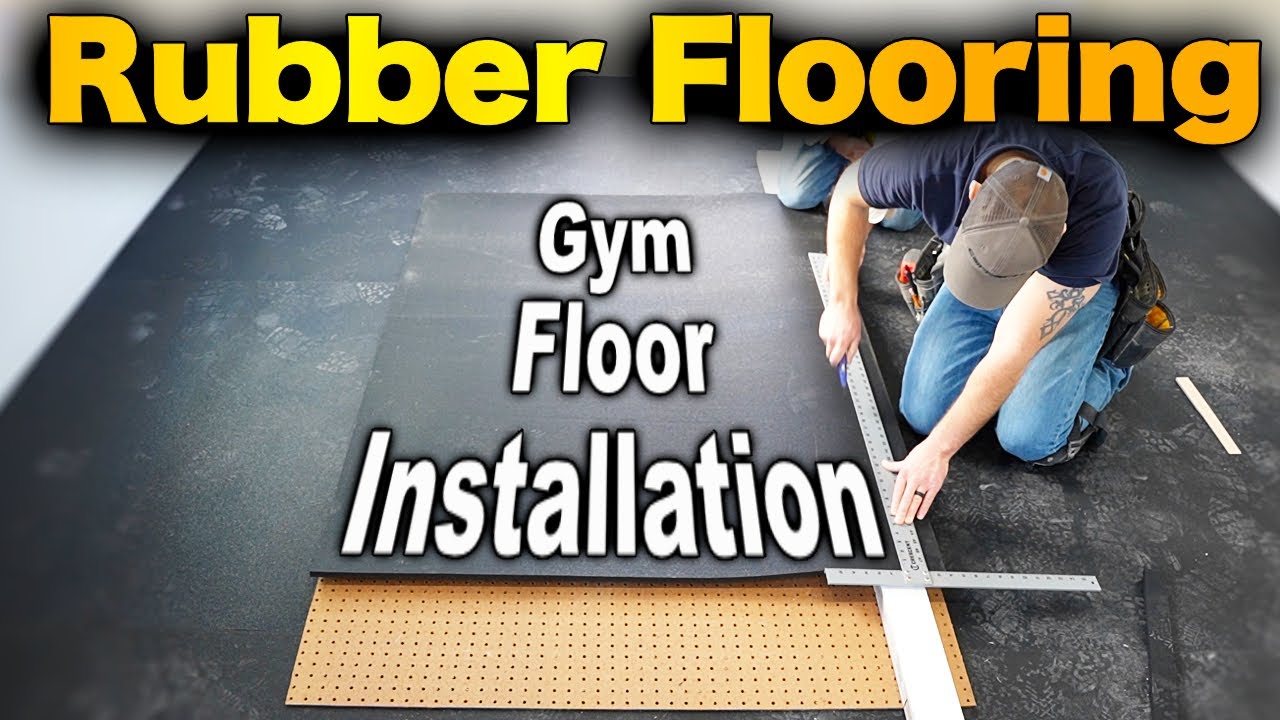
Image Source: i.ytimg.com
Why Install Gym Flooring?
Putting down gym flooring does more than just make your gym look good. It helps protect your floor underneath from heavy weights. It makes the area safer by offering grip. It can also help lower noise when you drop weights or jump around. It’s a smart choice for any home workout space.
Types of DIY Gym Flooring
There are a few main kinds of flooring you can put down yourself. Each has its own good points. Knowing the types helps you pick the best one for your needs.
Picking Your Floor Type
Your choice depends on what exercises you do, your budget, and how the area looks.
- Rubber Tiles: These are popular. They are strong and easy to put down. Many tiles fit together like puzzle pieces. This makes how to lay gym floor tiles simple. They come in different thicknesses. Thicker tiles protect the floor more.
- Rubber Rolls: These cover big areas fast. They are good if you have a large space. Installing gym floor rolls can need more cutting and may need glue to stay flat.
- Foam Mats: These are softer. They are good for bodyweight exercises, yoga, or kids’ play areas. Many foam mats have interlocking edges. You can easily install interlocking foam mats without glue. They are often less costly but not as tough as rubber for weights.
- Vinyl or PVC Tiles: Some tiles look like wood or stone. They are easy to clean. They work for lighter workouts but not heavy weights.
Let’s look closer at rubber flooring, as it is a top choice for home gyms. Many people want to know how to install rubber gym flooring.
Making the Floor Ready
Before you lay any new floor, the floor underneath must be ready. This is a very important step. Preparing subfloor for gym flooring properly helps the new floor lay flat and stay put.
Cleaning the Base Floor
Start by making the floor super clean.
- Sweep up all dust and dirt.
- Vacuum well to get small bits.
- Wash the floor to remove grease or spills. Let it dry fully.
- Look for bumps or holes. Fill holes with floor patch stuff. Scrape off bumps.
- The floor must be flat and dry. Any wet spots can cause big problems later.
What if the Floor Is Concrete?
Concrete is a common base floor.
- Check for cracks. Fix any cracks.
- Make sure it is smooth.
- A concrete floor can hold wetness. Use a moisture test kit if you think there might be wetness issues. High wetness can stop glue from working or cause bad smells. You might need a special seal on the concrete if it’s wet.
What if the Floor Is Wood?
Wood floors need checking too.
- Make sure the floorboards are tight. Nail or screw down any loose ones.
- Look for soft spots. These might mean bad wood underneath. Fix these areas.
- The wood floor must be flat. Sand down high spots.
- Make sure no nails or screws stick up.
Getting Everything Smooth and Level
Your gym floor will only be as flat as the floor under it. Take time to make the base floor ready. This step is key for DIY gym flooring installation to look good and last.
What You Will Need: Tools and Stuff
Having the right tools makes the job much easier and faster. Here are the common tools for installing gym flooring.
Tools for the Job
- Tape Measure: To find out how much material you need and where to cut.
- Utility Knife: A sharp knife is a must for cutting gym floor rubber or foam mats. Get extra blades; they get dull fast.
- Straight Edge or Ruler: For making straight cuts. A long metal ruler or a level works well.
- Chalk Line or Pencil: To mark your cuts.
- Cleaner/Degreaser: To clean the base floor well.
- Vacuum and Broom: For cleaning.
- Trowel: If you use rubber flooring adhesive that you spread.
- Roller: A heavy roller (like a floor roller) can help press glued flooring down well.
- Safety Glasses: Protect your eyes when cutting or using glue.
- Gloves: Protect your hands.
- Knee Pads: Installing floor can be hard on your knees.
- Mask: If using glue or working in a dusty spot.
- Optional: Jigsaw or Circular Saw: For some cuts on thicker rubber or if you need shaped pieces. Use a fine blade for rubber.
Materials You Might Need
- Your Gym Flooring: Tiles, rolls, or mats. Make sure you buy enough! Get a little extra (like 10%) for cuts and mistakes.
- Rubber Flooring Adhesive (If Needed): Some flooring types need glue. Check what glue works best with your floor material. Some glues are put on the whole floor, others just around the edges.
- Floor Patch/Filler: To fix holes or cracks in the base floor.
- Floor Cleaner: To clean the base floor before you start.
- Gym Floor Edge Trim (Optional): This makes the edges look nice and helps stop tripping. It gives a clean finish where the gym floor meets another floor.
Putting Down Rubber Tiles
Rubber tiles are a top pick for many home gyms. They are strong and easy to put down. How to lay gym floor tiles often means clicking or fitting pieces together.
Planning the Layout
Think about where you want the tiles to start.
- It’s often best to start in one corner or along a main wall.
- Lay out some tiles without glue first to see how they fit the space.
- Try to plan so you have fewer small cuts at the edges.
Laying the Tiles
- Start Point: Begin in your chosen corner or along a straight wall.
- First Tile: Place the first tile down carefully.
- Connect Tiles: Take the next tile and fit its edges into the first one. Many rubber tiles interlock like puzzle pieces. Push them firmly together so there are no gaps.
- Work Across: Keep laying tiles, connecting them as you go. Work across the room in rows.
- Keep Lines Straight: Check your lines as you go to make sure the rows are straight. A long ruler or line can help.
Cutting Rubber Tiles
You will need to cut tiles to fit edges or go around things like posts. Cutting gym floor rubber takes a sharp knife.
- Measure: Measure the space where the cut tile will go.
- Mark: Mark the cut line clearly on the tile. Use a straight edge.
- Score: Do not try to cut all the way through at once. Use your sharp utility knife and a straight edge to score the line. Press hard.
- Cut: Score the line many times. Each time, press a bit harder. You will cut deeper each time. Keep scoring until you cut all the way through. This takes time and many passes.
- Be Careful: Always cut away from your body. Use a thick board or piece of scrap wood under the tile when cutting.
Using Glue for Tiles
Some rubber tiles need rubber flooring adhesive.
- Check the maker’s directions.
- Some glues cover the whole base floor. You spread it with a trowel.
- Other glues go only around the edges of the room or just on the tile edges.
- If using glue, work in small areas. Lay the tiles into the wet glue as you go.
- Let the glue dry as the maker says.
Putting Down Rubber Rolls
Installing gym floor rolls is good for covering large areas without many seams. But it can be harder to cut and handle than tiles.
Getting the Rolls Ready
- Unroll the material in the room where it will go.
- Let it sit flat for a day or two. This lets the material relax and lay flat. This is called acclimatizing.
Laying the Rolls
- Start: Begin along a main wall. Line up the edge of the roll with the wall.
- Unroll: Slowly unroll the material across the room.
- First Piece: Get the first piece straight and flat.
- Next Pieces: If you need more than one roll width, lay the next roll next to the first. Make sure the edges touch tightly. You do not want gaps.
- Trimming: You will need to trim the ends to fit the length of the room.
Cutting Rubber Rolls
Cutting gym floor rubber rolls needs patience and a sharp knife.
- Measure and Mark: Measure the length you need. Mark the cut line on the roll.
- Use a Guide: Use a very long straight edge (like a long metal ruler or a plank of wood) for your cut line.
- Score and Cut: Like with tiles, score the line many times with a sharp utility knife. Press harder each time until you cut through.
- Cutting to Fit: Cut the edges that meet walls. Measure the space and mark the roll. Cut carefully.
Using Glue for Rolls
Rubber rolls often need rubber flooring adhesive to stay flat and not move.
- Check the product info for the right glue.
- You usually spread the glue on the base floor for one section at a time.
- Roll the rubber onto the wet glue.
- Use a heavy roller to press the rubber into the glue. This helps the glue stick well and gets rid of air bubbles.
- Work your way across the room, gluing and laying the roll section by section.
Putting Down Interlocking Foam Mats
Interlocking foam mats are the easiest to install. They are soft and good for workouts where you are on the floor a lot. Install interlocking foam mats with simple steps.
How They Fit Together
Foam mats usually have edges that look like puzzle pieces. They just connect by pushing the edges together.
Laying the Mats
- Start Point: Pick a corner or wall to start.
- Place First Mat: Put the first mat down.
- Connect: Take the next mat and line up the interlocking edges. Push them firmly together until they connect.
- Keep Going: Continue adding mats, connecting the edges.
- Fill the Space: Work across the room until you fill the area.
Cutting Foam Mats
Foam is much easier to cut than rubber.
- Measure: Measure the space at the edge.
- Mark: Mark the cut line on the foam mat.
- Cut: Use a sharp utility knife and a straight edge. You can often cut through foam in one or two passes.
- Fit: Place the cut mat into the space.
No Glue Needed
Most interlocking foam mats do not need glue. They stay in place because the pieces connect and the mats fill the space.
Finishing the Edges
Once the main floor is down, you might want to finish the edges. This makes it look neat and can stop the edges from lifting. Gym floor edge trim is made for this.
What is Edge Trim?
Edge trim is a piece that goes along the outside edge of your new gym floor. It creates a smooth change from the gym floor to the other floor.
How to Use Edge Trim
- Measure: Measure along the edge of your gym floor where you want the trim.
- Cut Trim: Cut the edge trim to the right length. Some trim can be cut with a utility knife, others might need a saw.
- Attach Trim: Trim can be attached in different ways. Some pieces snap into place. Some are glued down with strong glue. Some might be screwed into the base floor. Follow the directions for your specific trim.
- Corners: You might need special corner pieces, or you might cut the trim at an angle (like 45 degrees) to make neat corners.
Edge trim gives your DIY gym flooring installation a finished, pro look. It also makes the edge safer.
Extra Tips for Success
- Read Directions: Always read the directions that come with your specific flooring and glue. They have important details.
- Test Glue: If using glue, try a small spot first to make sure it sticks well to your base floor and your gym floor.
- Air Out: If using glue, make sure the room has fresh air. Glue can have strong smells.
- Heavy Weights: If you plan to drop heavy weights, you might need extra thick rubber flooring or add mats just for that area. Thick rubber (like 1/2 inch or more) protects floors best.
- Take Your Time: Do not rush. Taking your time helps prevent mistakes.
- Ask for Help: Some parts, like laying big rolls, are easier with another person.
Step-by-Step Look: DIY Gym Flooring Installation
Here is a quick list of the main steps for most DIY gym flooring projects:
- Plan: Pick your flooring type. Measure your space to buy enough.
- Prepare: Clean the base floor very well. Make sure it is dry, flat, and smooth. Fix any problems.
- Gather: Get all your tools for installing gym flooring and materials ready. This includes your floor material, cutting tools, maybe glue, and safety gear.
- Layout: Plan where to start laying the floor. Lay out a few pieces if you need to check the fit.
- Install:
- For tiles: Start in a corner or wall. Lay tiles, connecting them firmly. Cut tiles to fit edges. Use glue if needed.
- For rolls: Let rolls lay flat first. Unroll along a wall. Glue sections as you go. Cut rolls to fit the space. Press with a roller.
- For foam mats: Start in a corner or wall. Connect the interlocking edges. Cut mats to fit. No glue needed.
- Cut: Use a sharp utility knife and straight edge. Score rubber many times to cut. Foam cuts easier.
- Edges: Add gym floor edge trim if you want a finished look and safer edge.
- Clean Up: Clean up scraps and tools. Let glue dry fully if you used it.
Table: Comparing Flooring Types
| Feature | Rubber Tiles | Rubber Rolls | Interlocking Foam Mats |
|---|---|---|---|
| Protection | Good to excellent (depends on thickness) | Good to excellent (depends on thickness) | Okay for light use, not for heavy weights |
| Easy to Install | Very easy (especially interlocking) | Medium (can be heavy, need precise cuts) | Very easy (just connect) |
| Cost | Medium to High | Medium to High | Low |
| Looks | Can see seams between tiles | Fewer seams over large areas | Can see seams clearly |
| Best For | Free weights, machines, general gym area | Covering large gym areas, cardio zones | Yoga, bodyweight, kids’ area, floor work |
| Needs Glue? | Sometimes (check product) | Often | Rarely |
Questions People Ask
FAQ Section
Q: How much gym flooring should I buy?
A: Measure the length and width of your room. Multiply these numbers to get the square feet (or square meters). Buy about 10% extra. This extra is for cuts and mistakes.
Q: Do I need rubber flooring adhesive for tiles?
A: It depends on the tile type and where you put it. Some interlocking tiles do not need glue if they fit tightly wall-to-wall. Tiles that don’t interlock, or if you are laying them over a big area where they might shift, often need glue. Always check the maker’s guide for your specific tiles.
Q: How thick should my gym flooring be?
A: It depends on what you do.
* For light workouts, cardio, or bodyweight: 1/4 inch (6mm) might be fine.
* For general home gyms with machines and light weights: 3/8 inch (8mm) is a common choice.
* For heavy weightlifting and dropping weights: 1/2 inch (10mm) or thicker is best to protect the floor and the weights.
Q: Can I install gym flooring over carpet?
A: No, it is not a good idea. Carpet is too soft and uneven. Your gym floor will not be stable. It can move and create trip risks. It is best to remove carpet and padding first. Then prepare the hard floor underneath.
Q: How do I clean my new gym floor?
A: Most rubber and foam gym floors can be cleaned with a broom or vacuum. For deeper cleaning, use a mild soap and water. Do not use strong chemicals or lots of water. Make sure it dries well.
Q: How long does it take to install gym flooring?
A: It depends on the size of the room and the type of flooring. Preparing the floor can take a few hours. Laying tiles in a small room might take half a day. Laying large rubber rolls or working in a big space could take a full day or more, especially with gluing and cutting.
Putting in your own gym flooring is a job you can do. With careful planning, the right tools for installing gym flooring, and following these steps, you can create a great workout space at home. Preparing subfloor for gym flooring well and being careful when cutting gym floor rubber are key steps. Whether you install rubber gym flooring, how to lay gym floor tiles, or install interlocking foam mats, you can get a good result. Adding gym floor edge trim gives it a nice finish. Good luck with your DIY gym flooring installation project!