Image Source: images.ctfassets.net
Step-by-step how to install rubber gym flooring on concrete
Putting rubber flooring on a concrete floor is a great idea for a home gym. It makes the floor softer and protects it. This guide shows you how to do it right, step by step. We will cover everything from getting the floor ready to putting the mats down. What is the best way to stick rubber mats to concrete? Often, using a special glue, or adhesive, made for rubber and concrete is the best method for a lasting floor.
Getting the Floor Ready
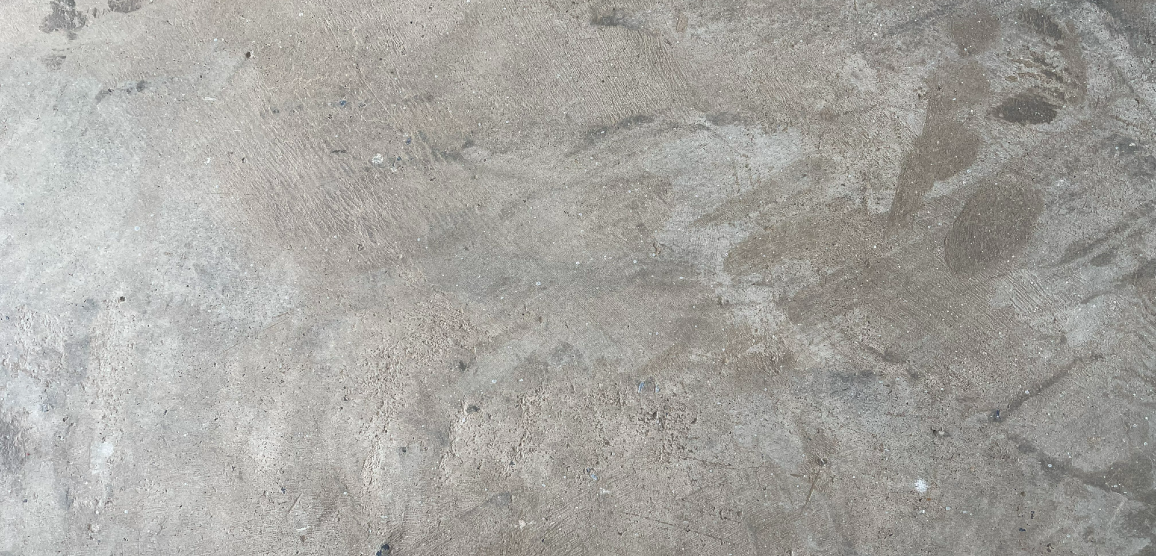
Good concrete floor preparation for gym flooring is super important. If the floor isn’t ready, the rubber mats might not stick well. They could lift up or move around. A clean, smooth, dry floor helps the mats stay in place for a long time.
Cleaning the Concrete
First, clean the concrete floor really well. Get rid of all the dirt, dust, and junk.
- Use a broom to sweep up big bits.
- Use a vacuum cleaner with a strong filter to get the fine dust. Dust is a big problem for glue.
- Look for grease, oil, or paint spots. These stop glue from sticking.
- You might need a special cleaner for concrete to remove tough spots. Follow the directions on the cleaner bottle.
- Rinse the floor with clean water if you use a wet cleaner.
- Let the floor dry completely. Use fans or open windows to help it dry faster. The floor must be very dry before you do anything else.
Making the Floor Smooth
The concrete floor should be as flat and smooth as possible. Bumps or low spots can make the rubber mats uneven. They can also cause the mats to wear out faster in those spots.
- Feel the floor with your hand or look closely. Find any bumps or dips.
- Small cracks might need filling. Use a concrete filler or patch made for floors.
- Big bumps might need grinding down. You can rent a concrete grinder for this. This tool smooths the top layer of the concrete. Be sure to wear a dust mask and eye protection if you grind the floor.
- Low spots might need leveling. This is called leveling concrete subfloor. You use a special mix called self-leveling underlayment. This mix is like a thick liquid. You pour it on the low spot, and it spreads out to make a flat surface. Follow the steps on the bag of the self-leveling mix. This step is key for a professional look and feel.
- After filling or leveling, let the patches or underlayment dry completely. This can take a day or more. Check the product instructions for drying times.
- Sweep or vacuum again to clean up any dust from smoothing or leveling.
Checking for Moisture
Concrete can hold water. Too much water in the concrete can stop the glue from sticking. It can also cause mold later. You need to check if the floor is dry enough.
- A simple way is the plastic sheet test. Tape a 2×2 foot piece of clear plastic to the concrete floor. Tape all the edges down tight. Leave it for 24 hours.
- After 24 hours, look under the plastic. If you see water drops on the plastic or the concrete looks darker, it means there is too much moisture.
- If there is too much moisture, you need to find out why. It could be water coming up from the ground. You might need to seal the concrete floor with a moisture barrier product. This product goes on the floor like paint. It stops water from coming through. Follow the product instructions carefully. Let the moisture barrier dry completely.
- Test again if you use a moisture barrier. The floor must pass the plastic sheet test before you move on.
Getting Your Stuff Ready
Before you start putting the rubber down, gather everything you need. This makes the job go smoother. Having the right tools for installing gym flooring saves time and effort.
Materials List
- Rubber Gym Flooring: This can be tiles or rolls. Tiles are often easier for small rooms or complex shapes. Rolls cover big areas faster but are heavier and harder to cut. Choose the thickness you want. Thicker mats offer more cushion but cost more.
- Adhesive: You need the best adhesive for rubber gym mats and concrete. There are different types.
- Polyurethane Adhesive: This is often used for rubber flooring. It is strong and lasts a long time. It can handle some moisture.
- Acrylic Adhesive: This might be used for some tile types. Check the flooring maker’s advice.
- Double-Sided Tape: For some light-duty tiles, strong tape might work. But glue is usually better for a home gym where weights might drop. Always use the adhesive the flooring maker recommends. Get enough glue for your whole area. Look at the glue’s coverage rate on the can or bucket.
- Sealer (Optional but Recommended): A seam sealer is used for sealing rubber flooring seams. This is a liquid that goes into the tiny gaps between mats or tiles. It helps keep dirt out and makes the floor look more finished. It’s very useful if your mats have straight, cut edges.
Tools List
These are common tools for installing gym flooring:
- Measuring Tape: To measure your room and the flooring pieces.
- Utility Knife or Heavy-Duty Cutter: For how to cut rubber flooring rolls or tiles. Rubber is tough, so you need a sharp, strong knife. Extra blades are a must. Blades get dull fast when cutting rubber.
- Straight Edge or Metal Ruler: To guide your knife when cutting. A long one (like 6 feet) is very helpful for rolls.
- Chalk Line or Pencil: To mark lines on the concrete or the back of the rubber.
- Trowel (for glue): If you use glue, you need a trowel with notches. The size and shape of the notches matter. They control how much glue goes on the floor. The glue maker will tell you what size trowel to use (e.g., 1/16″ x 1/16″ x 1/16″ square-notch).
- Roller: A heavy roller (like a floor roller, 75-100 lbs) helps press the rubber into the glue. This makes sure the glue sticks everywhere. You can often rent these. If you can’t get a heavy roller, you can use a smaller roller and push down hard, or even walk all over the floor once it’s down.
- Gloves: Glue can be messy. Wear gloves to protect your hands.
- Safety Glasses: Protect your eyes when cutting or using chemicals.
- Knee Pads: You will be on your knees a lot. Knee pads make it much more comfortable.
- Vacuum or Broom: For final cleaning.
- Cleaning Rags and Solvent: To clean up any extra glue right away. Use the solvent the glue maker suggests.
Letting the Rubber Get Used to the Room
Rubber flooring needs time to get used to the temperature and wetness (humidity) of the room where it will be laid. This is called acclimation of rubber flooring. If you don’t do this, the rubber can shrink or grow after you install it. This can cause gaps between the mats or make them buckle up.
- Bring the rubber rolls or tiles into the room where you will install them.
- Lay them out flat if possible. If they are rolls, unroll them slightly. If they are tiles, stack them loosely. This lets air get to all the surfaces.
- The room should be at a normal living temperature, like 65-75 degrees Fahrenheit (18-24 degrees Celsius). The humidity should also be normal.
- Let the rubber sit in the room like this for at least 24-48 hours. Longer is better, especially for rolls.
- Make sure the room temperature and humidity stay steady during this time.
Planning the Layout
Thinking about how you will lay out the rubber flooring before you start is important. This helps you use less material and makes the finished floor look good.
- Draw a simple map of your room. Write down the measurements.
- Think about where you want the seams to go.
- If you are using tiles, you might want to start in the middle of the room and work your way out. This way, any cut pieces will be near the walls where they are less seen.
- To find the center, draw lines from opposite corners of the room. Where they cross is the center. Or, find the middle point of each wall and draw lines across the room.
- If you are using rolls, plan how they will lay. Try to use full rolls for the longest runs. You will likely have to cut rolls to fit the length of the room and the last row against a wall.
- Think about doorways or corners. You will need to cut pieces to fit around these.
- Look at the pattern or texture of the rubber. If there is a pattern, make sure you lay all the pieces in the same direction. This makes the floor look even.
- Dry lay a few pieces or unroll a bit of the rubber without glue. See how it fits and how the seams look. This is a trial run.
Cutting the Rubber
Rubber flooring is tough. Knowing how to cut rubber flooring rolls and tiles correctly is key. Sharp blades are a must.
Cutting Rolls
- Unroll the piece you need. Measure the length you need from your plan.
- Mark the cutting line with chalk or a pencil on the back of the rubber.
- Place your long straight edge or metal ruler along the marked line. Hold it firmly in place.
- Use a sharp utility knife or heavy-duty cutter. Start cutting along the straight edge.
- Important: You will likely not cut all the way through in one pass. Rubber is thick. Make several passes with the knife, following the same line. Put steady pressure on the knife.
- Change your knife blade often! A dull blade is dangerous because it can slip. It also makes a rough, messy cut.
- For cross cuts (cutting across the width of the roll), you might need help holding the straight edge, especially on wide rolls.
- Be patient. Cutting takes time and effort.
Cutting Tiles
Laying rubber gym floor tiles is often easier for cutting.
- Measure the space where the tile will go (usually against a wall or around something).
- Mark the cut line on the back of the tile.
- Use your straight edge and sharp utility knife.
- Cut along the line, making several passes just like with the rolls.
- For cuts around poles or strange shapes, you might need to make a paper pattern first. Place paper on the floor shape, cut the paper to fit, then trace the paper pattern onto the rubber tile and cut it out. Trimming rubber gym flooring to fit edges and corners takes care.
Putting the Rubber Down
This is where the floor starts to take shape. We will cover gym floor adhesive application and putting the pieces in place.
If Using Tiles
- Start from your planned starting point (often the center or a straight wall).
- Lay the first tile carefully in position.
- If you are gluing, spread the adhesive on the floor for only one or two tiles at a time. Do not spread glue over the whole floor at once. The glue might dry too much before you get the tile down.
- Check the glue maker’s instructions for “open time.” This is how long the glue stays sticky and ready for the tile.
- Use the correct notched trowel to spread the glue evenly. Hold the trowel at the right angle (check the glue instructions) to make nice, even lines of glue. Gym floor adhesive application needs to be even.
- Carefully place the rubber tile onto the wet glue.
- Press the tile down firmly. Walk on it or use a smaller roller to push it into the glue.
- Lay the next tile next to the first. Push the edges together tightly so there are no gaps.
- Keep laying tiles, spreading glue as you go, one small section at a time.
- Wipe up any glue that gets on the top of the tiles right away with a damp cloth and the suggested cleaner.
- When you get to the walls, measure and cut tiles to fit. Remember that trimming rubber gym flooring pieces should be a bit smaller than the space if you need to fit them tight against the wall. But often you cut them exactly to size.
- After all tiles are laid, use the heavy roller over the entire floor. Roll in different directions. This makes sure every part of the tile is pushed into the glue.
If Using Rolls
- Start with your first full roll along a straight wall or your starting line.
- Unroll the rubber and lay it in place without glue first. Make sure it fits along your line.
- Fold back half of the roll carefully.
- Spread the adhesive on the exposed concrete floor. Cover the area where the folded-back rubber will go. Use the correct notched trowel. Spread the glue evenly, just like for tiles. Pay attention to the spread rate instructions on the glue bucket.
- Carefully lay the folded-back rubber roll into the wet glue. Try not to trap air bubbles.
- Press the rubber down firmly into the glue. You can walk on it or use a smaller roller.
- Now, fold back the other half of the roll.
- Spread glue on that half of the concrete floor.
- Lay the rubber into the glue.
- Lay the next roll next to the first one. Push the edges together tightly. There should be no gap (butt joint). If you cut the edge, make sure it’s a straight cut.
- Continue laying rolls this way, gluing one half at a time.
- When you get to the end of the room or obstacles, measure and cut the rubber rolls to fit. Remember how to cut rubber flooring rolls carefully with a straight edge and sharp knife. Trimming rubber gym flooring along edges requires careful measurement and cutting.
- After all the full and cut pieces are down, use the heavy roller over the entire floor. Roll across the seams and in different directions to press the rubber into the glue everywhere.
Finishing Touches
Once the rubber is laid and the glue is starting to set, you can do the final steps.
Rolling Again
- Check the glue maker’s directions. Some glues need you to roll the floor again after a certain amount of time (e.g., 1 hour later).
- Roll the entire floor again with the heavy roller. This helps the glue grab the rubber as it dries.
Sealing Seams
Sealing rubber flooring seams is a step many people do, especially in commercial gyms. It’s a good idea for home gyms too.
- Get the seam sealer product. It often comes in a bottle with a thin tip.
- Run the tip along the seam (the line where two pieces of rubber meet).
- Apply a thin line of sealer into the small gap. Don’t use too much.
- Wipe away any extra sealer that gets on the top of the rubber right away. Use a clean cloth. Some sealers might need a special cleaner.
- Sealing helps stop dirt, sweat, and spills from getting into the seams. This keeps the floor cleaner and makes it last longer.
Cleaning Up
- Clean up any glue that is still wet. Use the right cleaner or solvent recommended by the glue maker. It’s much harder to clean glue after it dries.
- Throw away rubber scraps.
- Clean your tools, especially the trowel and knife blades, before the glue dries on them.
Letting the Floor Dry
The glue needs time to dry and become strong. This is called the cure time.
- Do not walk on the new floor for at least 24 hours. Check the glue maker’s instructions; some might need longer.
- Do not place heavy gym equipment or weights on the floor for several days, maybe up to 72 hours or longer. Again, check the glue’s instructions.
- Make sure the room has good airflow while the glue dries. This helps the drying process. Open windows if the weather is good, or use fans.
Taking Care of Your New Floor
Once the glue is fully dry, your new rubber gym floor is ready to use! Taking care of it will keep it looking good and lasting a long time.
- Sweep or vacuum the floor often to remove dirt and dust.
- For cleaning, use a damp mop with a pH-neutral cleaner. Do not use harsh chemicals, floor wax, or too much water.
- Wipe up spills right away.
- Rubber can smell for a while after it’s installed. This smell goes away with time and good airflow.
Troubleshooting Common Issues
Even with good planning, things can happen. Here are some common problems and what to do.
-
Rubber Not Sticking:
- Was the concrete floor preparation for gym flooring done well? Was the floor clean and dry?
- Was the best adhesive for rubber gym mats used? Was it the right type and amount?
- Did you let the rubber acclimate?
- Was the floor rolled well to press the rubber into the glue?
- Did you put the rubber down within the glue’s “open time”?
- If a spot lifts, you might be able to lift the edge carefully, put more glue under it, and press it down again. Use something heavy to hold it down while the new glue dries.
-
Gaps Between Pieces:
- Were the edges pushed together tightly during laying?
- Was the rubber allowed to acclimate? Shrinking after laying causes gaps.
- If the gaps are small, sealing rubber flooring seams can help hide them and stop dirt.
- If gaps are big, you might need to cut a thin strip of rubber to fit into the gap and glue it down.
-
Cutting Problems:
- Was the knife blade sharp enough? Always use a fresh blade for clean cuts.
- Was the straight edge held firmly?
- Trimming rubber gym flooring takes practice. Go slow and make multiple passes.
A Note on Un-glued Installation
Some thicker rubber tiles (like 3/8″ or 1/2″) can sometimes be laid without glue, especially in a room where the rubber goes wall-to-wall. The weight of the rubber itself helps hold it in place. This is faster and easier, but there is a higher chance of the mats shifting over time, especially in areas with heavy use or equipment movement. If you choose this, make sure the edges against the walls are tight, or even use a thin strip of glue just around the outside edge of the room. However, for a permanent, secure floor, using the best adhesive for rubber gym mats is recommended.
Summary of Key Steps
Putting rubber gym flooring on concrete involves several stages.
| Step | Quick Description | Why It Matters |
|---|---|---|
| Prepare Floor | Clean, smooth, and dry the concrete. | Glue sticks well; floor looks good and lasts. |
| Check Moisture | Test concrete for water coming up. | Water stops glue and causes problems later. |
| Gather Materials | Get rubber, glue, sealer, and tools. | Have everything ready before you start. |
| Acclimate Rubber | Let rubber sit in the room for a day or two. | Stops shrinking or growing after you lay it. |
| Plan Layout | Decide where pieces and seams will go. | Helps use material wisely and makes floor look good. |
| Cut Rubber | Measure and cut pieces to fit using a sharp knife. | Makes sure pieces fit correctly, especially edges. |
| Lay Flooring | Spread glue (if used), lay rubber, push edges tight. | Attaches rubber to floor; makes floor look smooth. |
| Roll Floor | Use a heavy roller to press rubber into glue. | Ensures rubber sticks everywhere glue is present. |
| Seal Seams (Optional) | Put sealer in gaps between pieces. | Stops dirt and makes floor easier to clean. |
| Clean Up | Remove extra glue and scraps. | Keeps the finished job looking neat. |
| Let Dry | Stay off the floor until glue is fully set. | Gives glue time to get strong. |
Frequently Asked Questions (FAQ)
How thick should my rubber gym flooring be?
It depends on what you do in your gym.
* 1/4 inch (6mm): Good for cardio machines and light weights.
* 3/8 inch (8mm): A common choice. Good for general home gym use, including some weight dropping.
* 1/2 inch (12mm) or thicker: Best if you plan to drop heavy weights often (like powerlifting). It protects the concrete and the weights better.
Can I install rubber flooring outside on concrete?
Some rubber flooring is made for outside use. It needs to be able to handle sun, rain, and temperature changes. You would need a special outdoor adhesive that works on concrete and rubber and can handle wetness. The concrete also needs to drain well.
What if my concrete floor isn’t perfectly flat?
Small bumps can sometimes be smoothed with a grinder. Low spots might need leveling concrete subfloor with a self-leveling mix. If the floor has big slopes or unevenness, it might cause problems with laying the rubber flat. Rubber flooring can hide very minor floor flaws, but big ones will show or cause issues.
How do I clean gym floor adhesive application mistakes?
Clean wet glue right away! Use a rag and the solvent recommended by the glue maker. If the glue dries, it is very hard to remove. You might need a special scraper or strong cleaner, but be careful not to damage the rubber. This is why cleaning as you go is important.
Is sealing rubber flooring seams really needed?
It is not always required, but it is a good idea. It helps stop dirt and sweat from getting into the cracks between the mats. This makes the floor easier to keep clean. It also helps the floor look more like one smooth surface. If you have cut edges, sealing is especially helpful.
Can I paint or seal the concrete before laying the rubber?
If you need a moisture barrier, you will use a special sealer for that. However, painting or sealing the concrete with regular paint or sealer is often not a good idea. The rubber glue might not stick well to the paint or sealer. The best concrete floor preparation for gym flooring is clean, smooth bare concrete unless a moisture barrier is needed. Always check the glue maker’s directions about what the concrete surface should be like.
Putting in your own rubber gym floor takes work, but it is a job most people can do. By following these steps and taking your time, you can have a safe, good-looking gym space right on your concrete floor.